

Working With, and Learning From, Textile Conservator Ada Hopkins

While on my incredible continuing journey with my tapestry exhibition, Stitched Glass, and the accompanying piece of theatre, The Knitting Pilgrim, I thought it would be interesting to take a peek into the creative process of some of the people on our team, prepping the show for Ergo Arts Theatre. Here, textile conservator Ada Hopkins writes about her process mounting the finished Stitched Glass tapestries onto backing for future framing. Ada has worked as a textile conservator at the Bata Shoe Museum in Toronto, Canada, for the past 30 years, specializing in footwear made from animal skins and textiles. She has also performed treatments for private collectors and public institutions, including mounting large and small textiles, fabricating mannequins, and conserving elements of clothing for display.
My profound thanks to Ada for the work she has done on the Stitched Glass tapestries. Take a peek into her process here:

Ada Hopkins
Ada Hopkins:
The Project
When Kirk approached me about working on the mounting and preservation of the Stitched Glass tapestries, I was intrigued. It was different from anything else I’d done in my textile career. Kirk was facing several challenges in his goal to not only display the knitted tapestries, but mount them and tour them. Knitting, like all textiles, is subject to gravity (which can pull on the fibres), changing environments, travel, exposure to light, pests and moisture.
The first goal was to get the tapestries mounted and ready for framing. We’d deal with travel next.
Preparation of Three Knitted Tapestries for Display
Preparing the Under-Padding
The black lines – the “cames” in stained glass window speak – had more depth than the pictorial panes, because this was where Kirk joined the tapestry sections together (the tapestries were too large to be knitted in their entirety on a single set of needles). We decided to place padding underneath each pane in order to give the tapestry a smoother appearance.

A colour photograph of each panel was printed onto an 8 ½” x 11” piece of paper, which was overlaid with a sheet of thin polyester film. The individual panes of the tapestry were traced onto the film and each section was numbered to determine its location, as each one is a different shape.
Next, a very large sheet of clear plastic was placed over the tapestry. The outline of the individual panes was traced and the appropriate number, transposed from the template, was written on each pattern piece. The numbered sections were placed on polyester batting and cut to size.

The knitted tapestry was flipped over onto a drop sheet on the floor. The individual pieces of padding were basted to the back of the corresponding panel between its surrounding cames.

In this photo, you can see the knitted tapestry, flipped face down on a drop sheet on the floor. The polyester film templates for the padding are piled on the side, and the black polyester batting, cut into sections, matches the sections of the tapestry.
Attaching the Knitted Tapestries to the Support Fabric
The next step was to attach each tapestry to a black wool panel, so that when the tapestries were vertical, they would have support, and gravity wouldn’t pull on the knitting.
First we had to measure the tapestries. And measure again. And remeasure. The knitting has give, so we needed to make sure we felt certain about our measurements to pass along to Ontario Staging, a company in Toronto that has been manufacturing stage drapes for over 30 years, supplying film, TV, schools, churches, and special events across Canada.
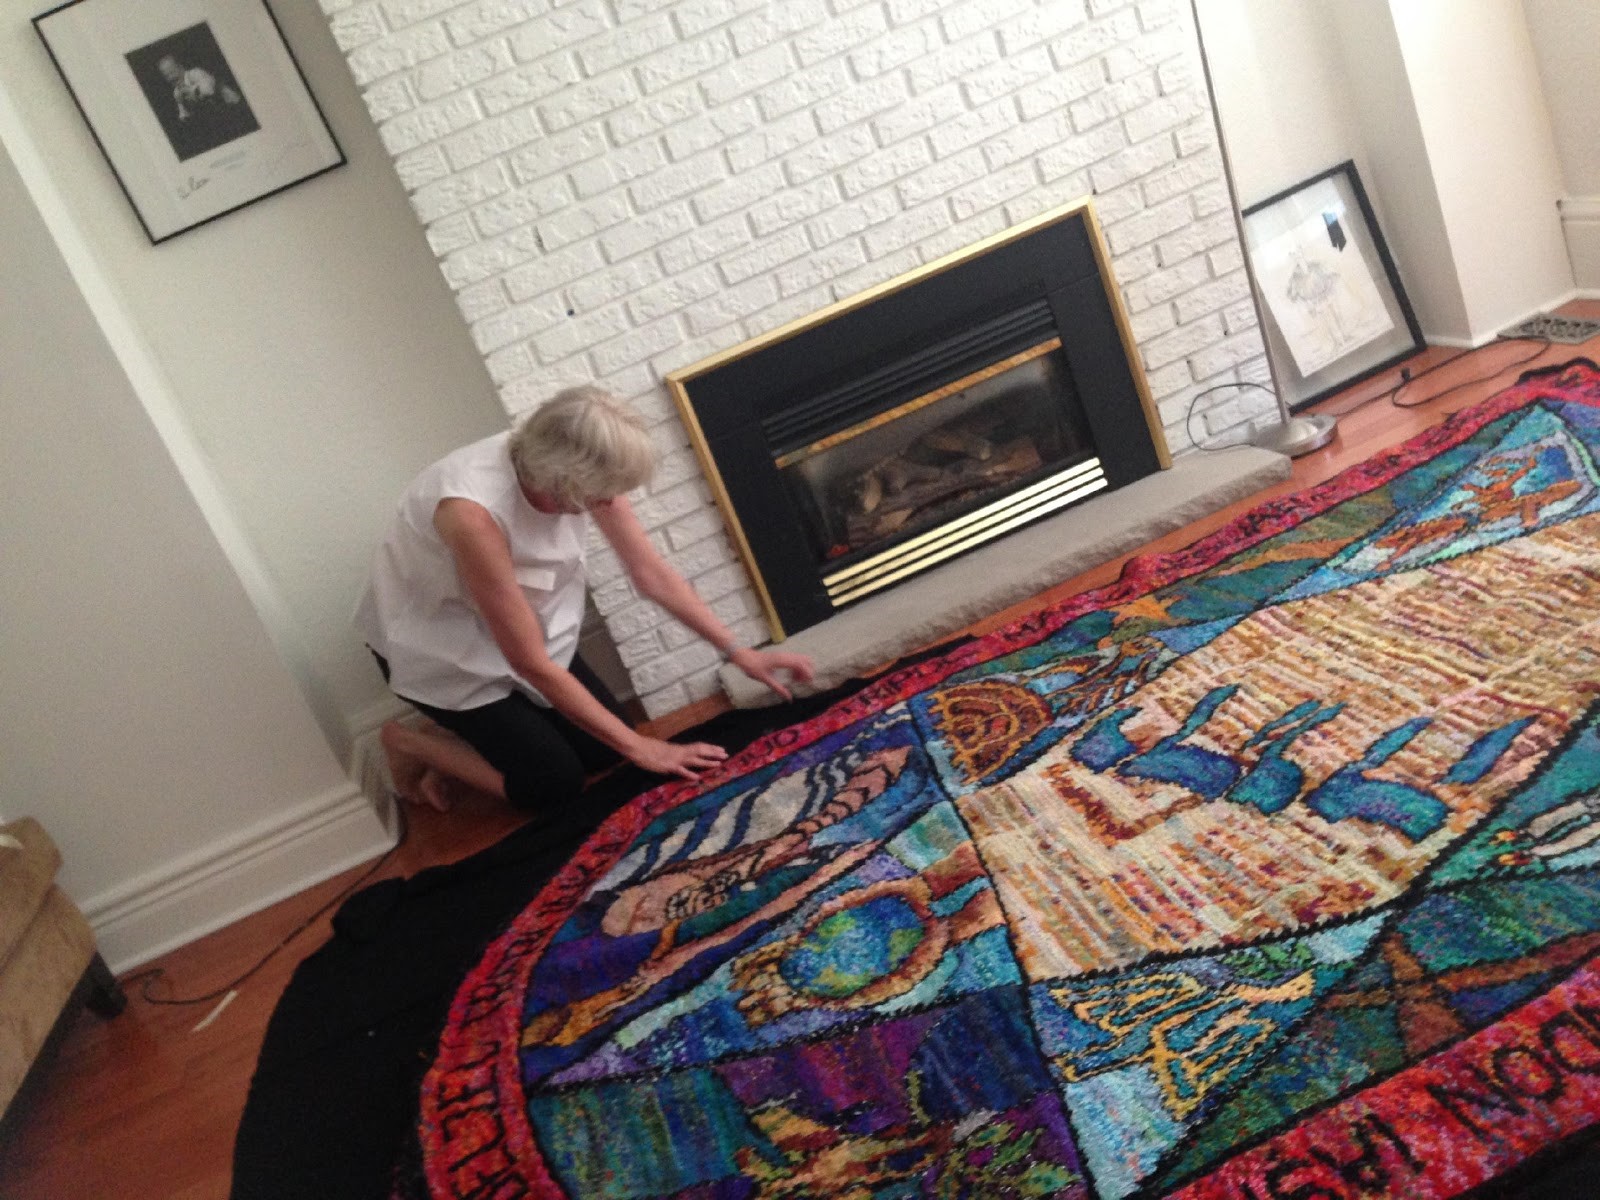

We visited with Natalie Smith and Maria Physentzou at Ontario Staging, and described what we needed. We decided together to have them build three black woolen panels for backing, with grommets every 6 inches apart, so that the tapestries, once sewn to the backing, could be laced to the frames.

Each black wool panel is composed of two vertical sections to provide the overall necessary width, with the seam down the centre. Grommets are equally placed around all four edges through which nylon thongs are laced.
Attaching the Wool Panels to a Wood Frame
The next step required a large wood frame that was 12’ x 8’ to which the wool panels could be tied, using the laces provided by Ontario Staging. Joel Robson kindly made the tapestry assembly frame for us. Joel is a Toronto-based designer/maker assisting museums, galleries and private collectors with their display furniture. He is currently head of installation at the Textile Museum of Canada and former head of installation at the Gardiner Museum. It had to be something we could easily take apart, transport into my studio space, and then disassemble again once I was done working on the tapestries. Joel did a great job.


The measurements to locate the centre of the width and the centre of the length were determined. These coordinates were transferred to the wool panel with butcher’s string, held onto the frame by pushpins. The margins, around the perimeter of all four edges, were calculated and marked using the same technique. The central width and length of the knitted tapestry was determined; string was then attached with safety pins to make sure tjat the tapestry didn’t move when it was laid over the black wool. All these lines made sure the knitted tapestry was centred properly.
Here is Joel’s frame, with the Christian tapestry attached to it by laces.

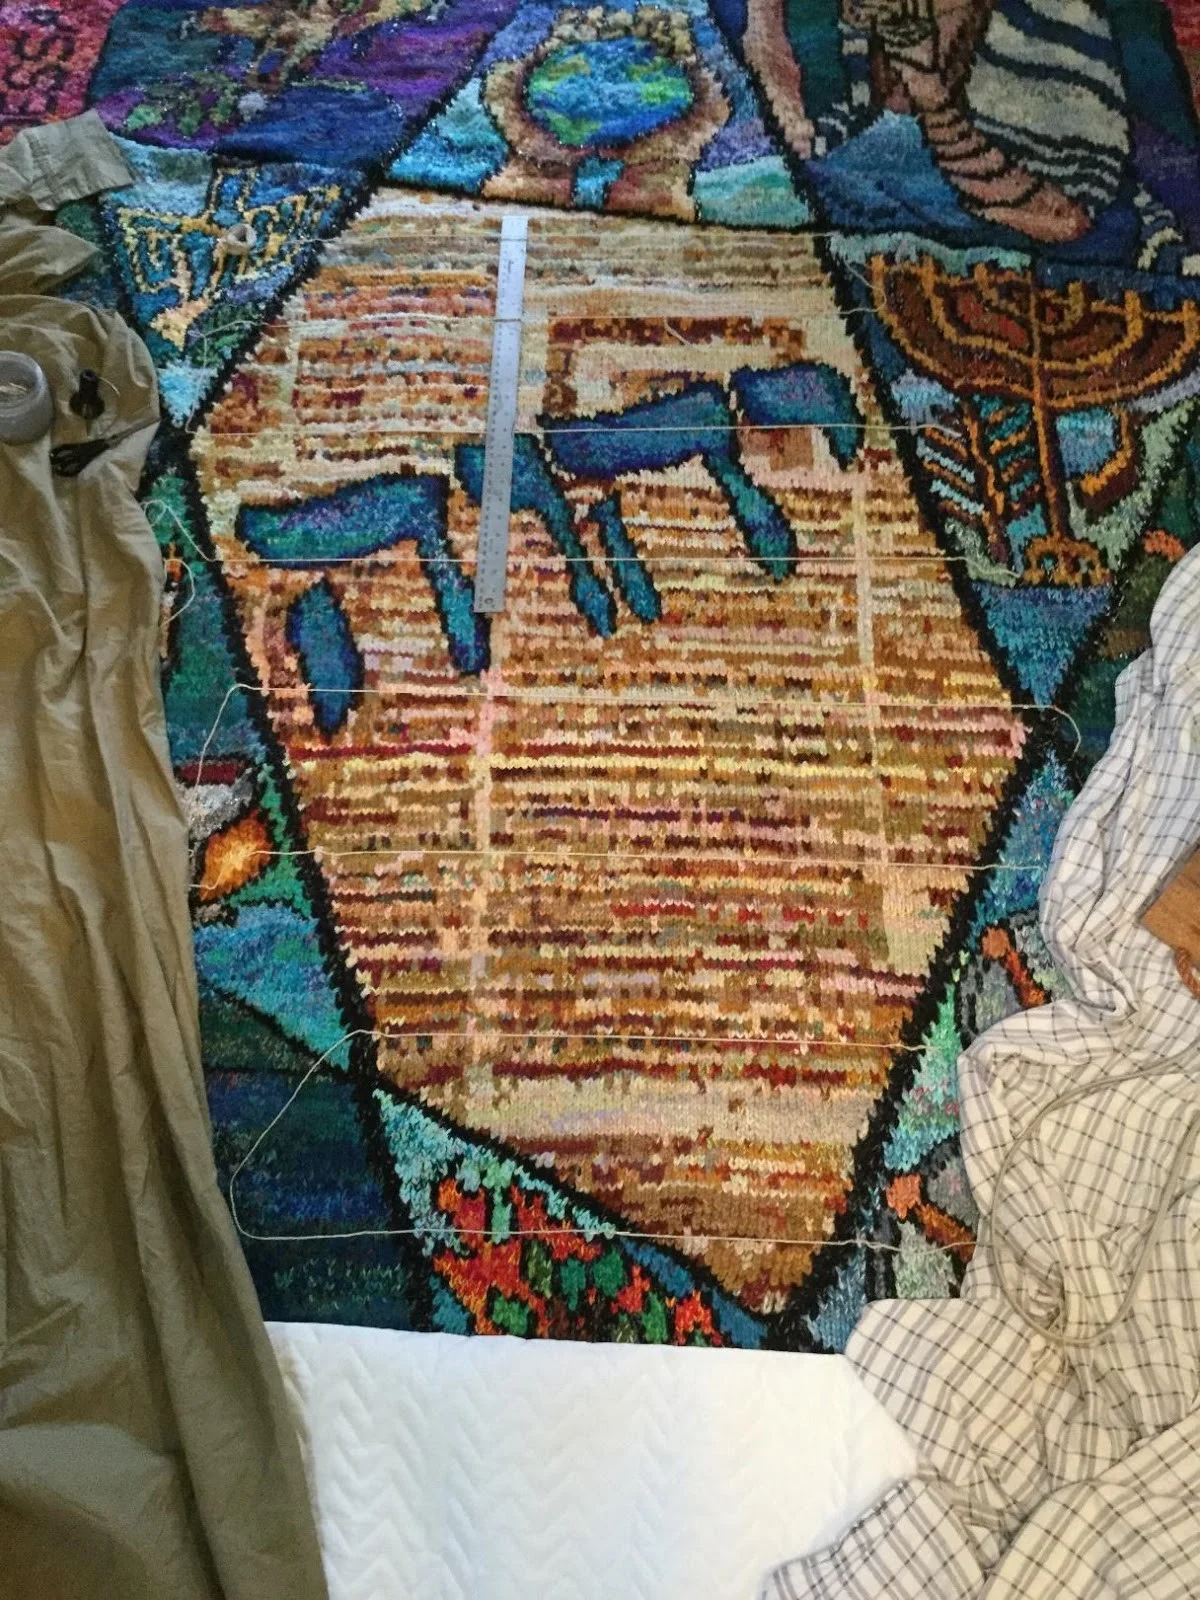
The perimeter of the knitted tapestry was hand-stitched with nylon upholstery thread and a tapestry needle. This stitching followed the interior and exterior edges of the black outlines of the Christian and Judaic tapestries. (The Islamic tapestry did not have the same border treatment, so a single row of stitches was used to attach it to the wool support.) This held the knitted tapestry centered on the black wool support, keeping it centered when the entire unit was untied and placed on the drop sheet that was spread out underneath the frame. The frame proved too wide to work from the sides of the frame while seated.
Large sheets of mat board were slipped between the knitted tapestry/wool support and the drop sheet. This prevented them from becoming accidentally sewn together when the curved upholstery needle/nylon thread passed through the tapestry/support. The boards also provided resistance so that I knew when the needle passed through the three layers: knitted tapestry, padding, wool support.
The knitting was covered with quilted tablecloth under padding and bed sheets. This protected the knitting, as I needed to work directly on top of the entire panel with only the area to be stitched exposed. Working from the centre outwards, the stitching progressed, image by image. The section being worked on was pressed with a steam iron through several layers of damp toweling to ease out any ripples. The first set of stitches was made along the edge of the black came of the selected image.

Here’s an example of one section of the Judaic tapestry after steaming and stitching around its perimeter cames.
Once that was accomplished, a stitching grid was established using butcher’s string held in place with straight pins. A horizontal grid was set up every 10 – 15cm, followed by stitching along these lines. Then the vertical portion of the grid was established in the same manner.

The mouting of all three tapestries took approximately a month, working in the evenings and on weekends. It was amazing to see the smoothed-out, finished tapestries once all the stitching was complete. They really ‘pop’ visually against the black background.
I’m excited to see the next steps: getting the tapestries, now attached to the backings, into frames.